|

Login - Specialist suppliers
Login - Sales representatives
|
Craft ideas and instructions
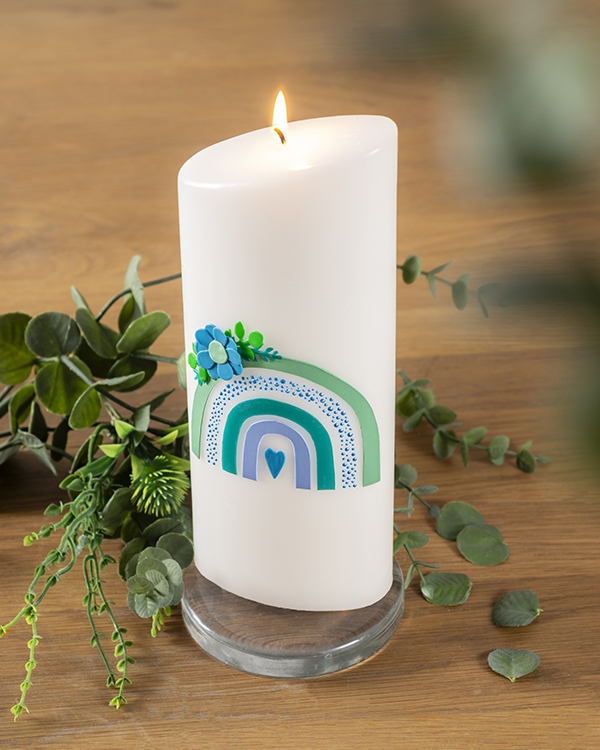
Rainbow candle
Idea and Realisation: Kathleen Hauck
|
enlarged picture

enlarged picture
|
List of materials
| Art. no. | Name of article |
| 1802523 | Scalpel comfortline, with 5 blades |
| 1802830 | Cutting mat, DIN A4, 220 x 300 x 3 mm |
| 3509016 | Candle incl. box, ellipse beveled, 230 x 90 x 55 mm, white |
| 3516046 | Wax sheet, 200 x 100 x 0,5 mm, 2 pcs., light blue |
| 3516055 | Wax sheet, 200 x 100 x 0,5 mm, 2 pcs., turquoise |
| 3516056 | Wax sheet, 200 x 100 x 0,5 mm, 2 pcs., blue pastel |
| 3516061 | Wax sheet, 200 x 100 x 0,5 mm, 2 pcs., pastel green |
| 3516066 | Wax sheet, 200 x 100 x 0,5 mm, 2 pcs., light green |
| 9317448 | Candle Paint, 28 ml, light blue |
| 1790031 | Punch S, heart narrow, 15 x 9 mm |
| 1791186 | Punch M, leaf, 25 x 17 mm |
| 1791329 | Punch M, leaf, 25 x 13 mm |
| 1791286 | Punch M, retro flower, 24 mm |
| 1790011 | Punch S, circles, 3 / 10 mm |
| Additionally: baking paper |
|
Instructions
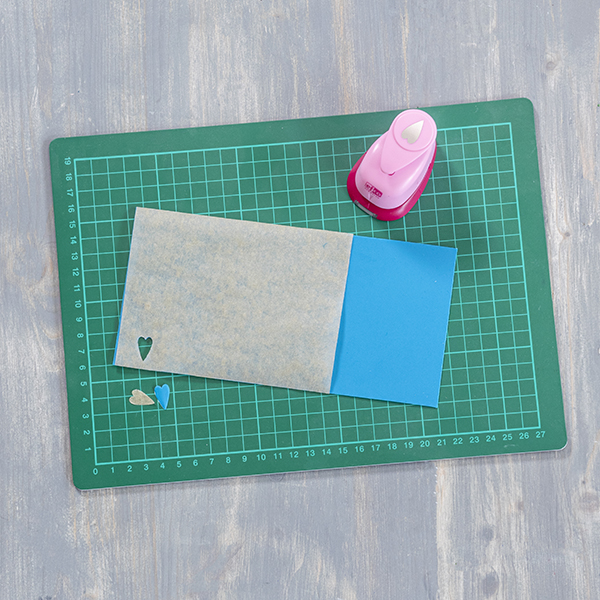
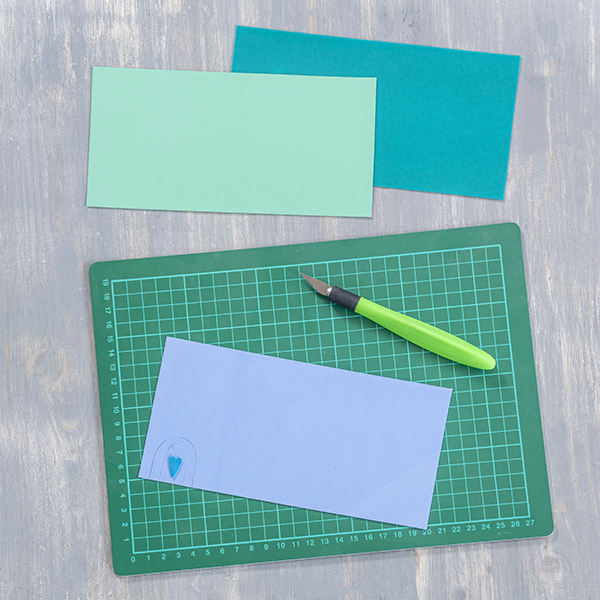
| 1. | Place some baking paper on the desired wax sheet and punch out a narrow heart. Remove the baking paper from the heart. |
| 2. | Place this heart loosely on the next sheet of wax and cut out the first sheet all the way round. First cut out a bow without a template around the heart, leaving a small gap. Then use the scalpel to cut out a second, slightly larger bow that is roughly the same distance from the first bow. The smallest arch of the rainbow is now cut out. Carefully remove it and place it on the next sheet of wax. Cut out as many arches for the rainbow as you like in this way. Leave larger gaps between the arches which you colour later with candle paint. |
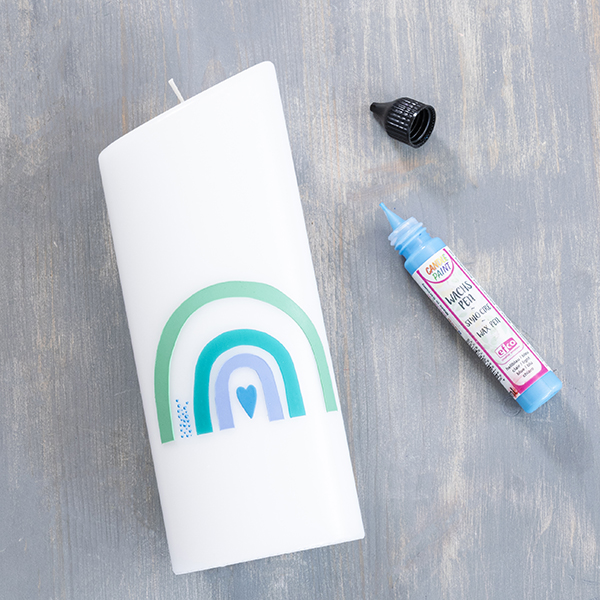
| 3. | Remove the backing paper (reverse side) from the heart and place it in the middle of the candle. Then place the cut-out sheets from small to large, without paper, on the candle and align. Then stick the motifs to the candle by applying light pressure with your hands. Your hand warmth fixes the motifs on the. Decorate the blank spaces with candle paint. Apply lots of small dabs and leave to dry. |
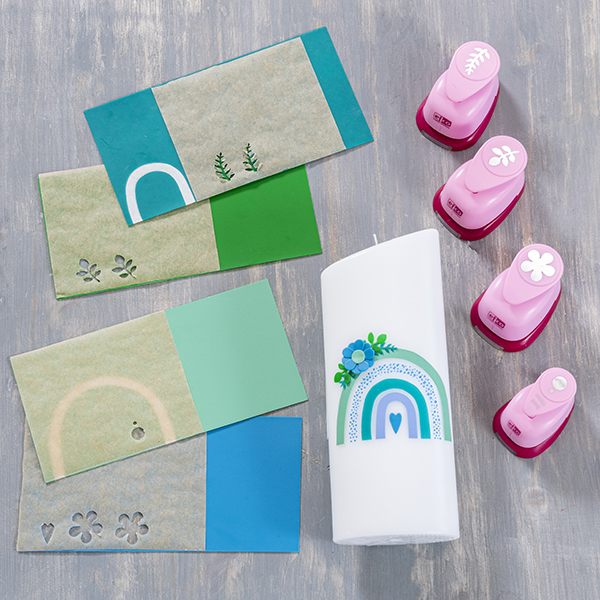
| 4. | Finally, punch out the flower and branches. To do this, place some baking paper on top of the wax plate again and then punch out the desired motif. Remove the baking paper and backing paper from the motifs. First attach the twigs to the candle above the last arch. Then add the flower between the branches. Do not press it onto the candle all over, but only attach it to the centre of the candle so that the petals protrude slightly from the candle. This makes the flower look more three-dimensional. Place a second flower slightly offset over the first one and press it also only in the centre. Finally punch out a circle and place it in the centre of the flower. |
|
|
|
TipPlace the sheet of wax in the fridge for a while before punching out, this will make it firmer and easier to punch.
« back to the overview
|
Creative tips
more on the subject »
more on the subject »
more on the subject »
|